|
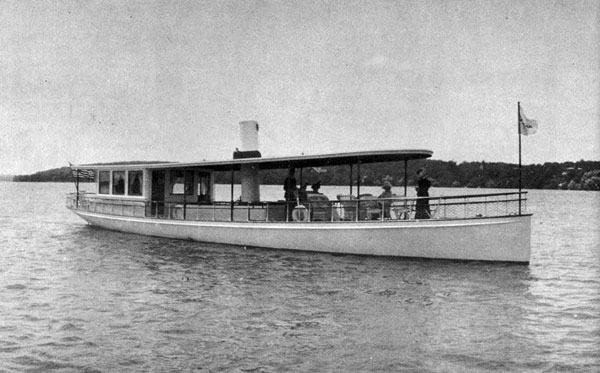
The Story of Hathor (Continued) CHAPTER 2, THE RESTORATION PROCESS
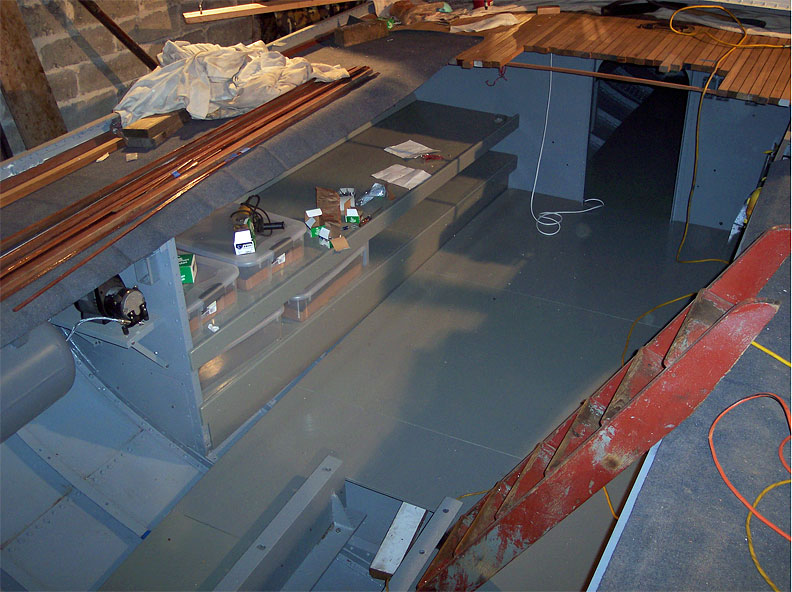
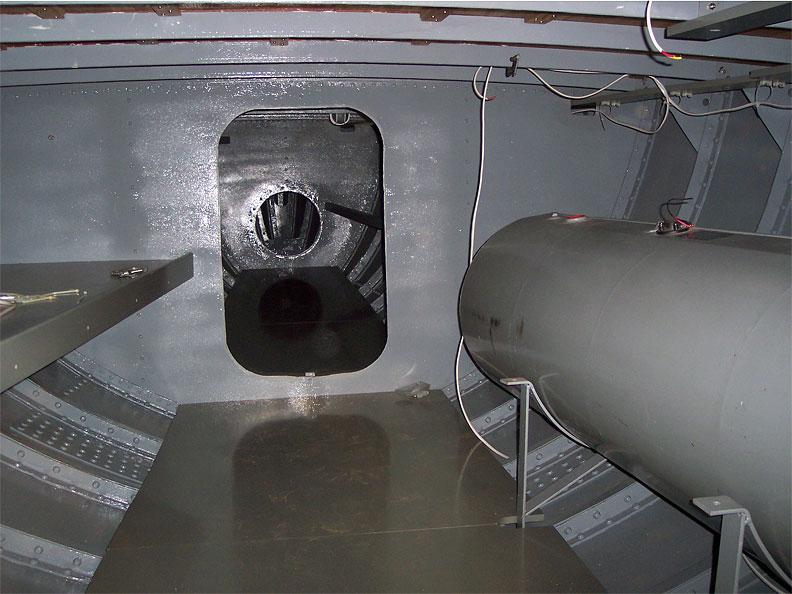
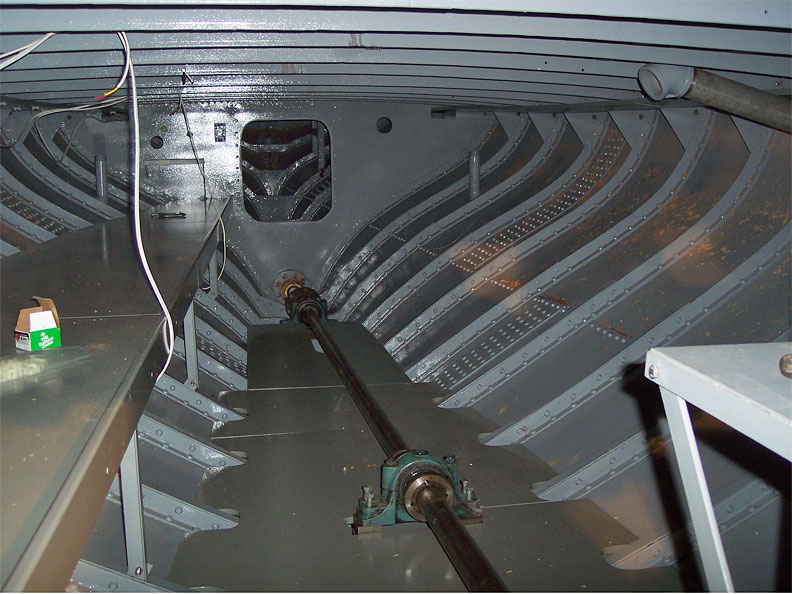
We started to reinstall the engine bed, propeller shaft, shelves, and fixtures during the winter of 2007-8. Every piece of steel that was put back was sand blasted and coated with the full immersion epoxy primer. In January, 2008 we started to re-lay the deck. I was fortunate to find Earl Lima who had laid the decks on several excursion boats to help. Choosing the deck material was difficult. We looked at white pine which was the traditional material, but it is high maintenance because it is very soft and every piece of sand or gravel that sticks to someone's shoes makes a little dent in the deck which then turns black when it gets wet. We looked at long-leaf yellow pine which is a little harder, fir, white cedar, mahogany, ipe, and teak. We made up samples of the most promising and placed them outside to weather and we walked on them to simulate what they would see in service. We ended up using teak. The pluses were that is very forgiving of being walked on, it has a wonderful feel of velvet under bare feet, it is durable, and it doesn't rot. The big minus is that it turns dishwater gray after a couple of year's exposure to the sun and weather and it must be maintained, that is, scrubbed and sanded. The decking is 1.5 inches thick.
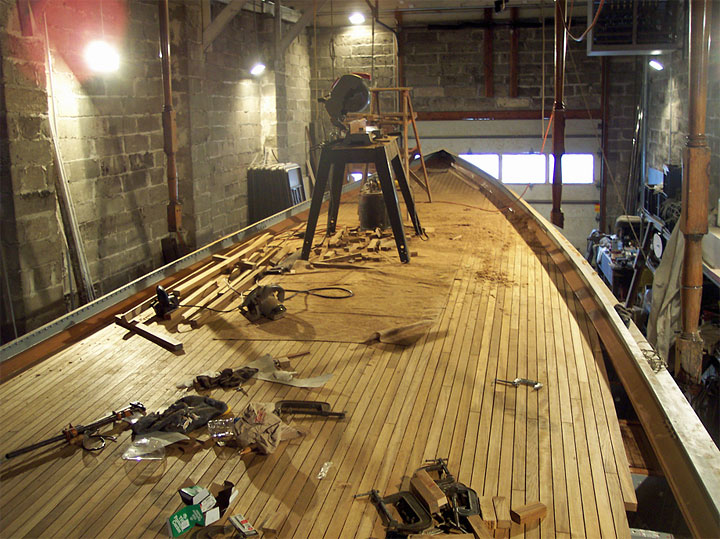
New mahogany covering boards along the edge of the deck and new teak decking in place. In the meantime, we were working on the cabin. The outside of the cabin was originally white pine and had been painted with white enamel. It was in remarkably good condition. The only parts we had to replace were the bottom board on each side, and the front starboard corner. The cabin inside was another matter. When McKee did the 1939 restoration, the original cabin interior apparently had been badly damaged. So he removed it and replaced it in the then popular art deco style. Curving panels of blond finished plywood above the window sills, and dark mahogany plywood panels accented by horizontal battens below the window sills. Much of this plywood had delaminated and there were layers of it hanging in space. Also, extensive rot had set in. So we stripped the cabin interior from the framing and burned it.
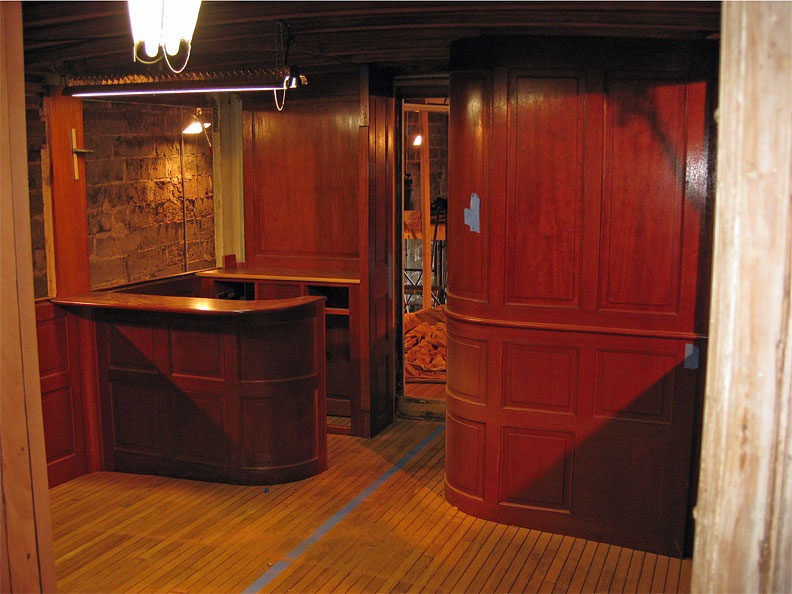
New cabin interior being installed. On the left, looking aft with the galley on the left and the head on the right. The right photo is looking forward and shows the new buffet at the front of the cabin. The new teak deck is clearly visible. I worked with a talented wood craftsman, Van Krumpen, in Genoa City, WI who had done boat cabin interiors before. We photographed the cabin interior structure and looked for witness marks from the original cabin partitions. These were things like a shadow on the wall where a panel might have been attached and the wood color changed slightly, screw holes where panels had been attached, places that had been chiseled out for panels, remnants of old moldings on the ceiling, marks on the floor where original panels had been attached, and different types of wood framing to determine what dated from 1898 and what was from the 1939 restoration. We went to old Racine Boat Company catalogs and looked at interior details on other Racine boats of the period, and we studied the two other surviving Racine boats from that era. We also looked at other boat manufacturer's cabin interiors from the 1890's that were pictured in early boat magazines and reference books. Then we tried to recreate as nearly as possible the original cabin interior. We had new cutter heads made for the wood-working machines to re-create the moldings and trim that were originally used. The cabin interior was completed in 2007. Archie McDonald, a wonderfully skilled cabinet maker, made the interior cabin paneling and installed it as well as the new cap rail and hand rails. The wood has been stained and varnished, and has now been installed.
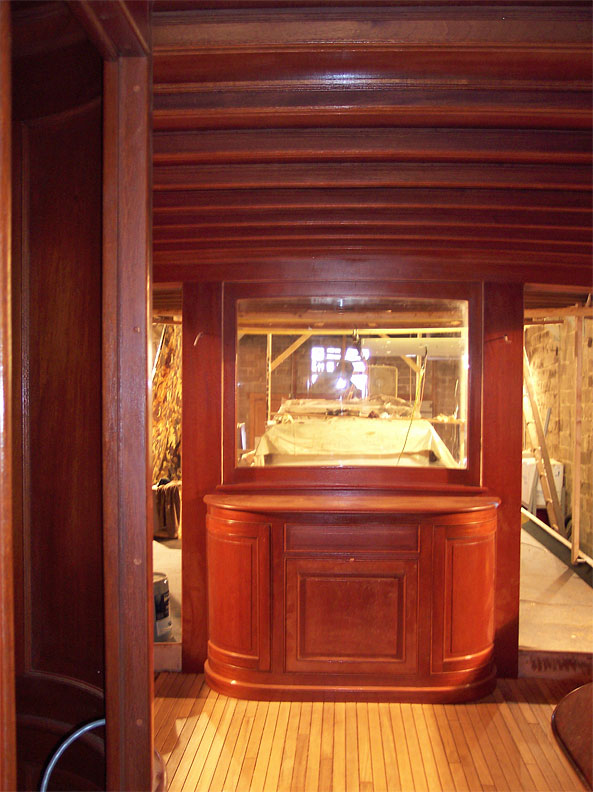
Front of cabin seen from rear cabin door. The canopy is still original. It is made of 2-inch wide fir strips with a little round bead on the edge of each strip. In the 1939 McKee restoration, the workers must have looked at the old varnish on the underside of the canopy and decided rather than remove it and refinish the wood they would put pieces of _" plywood veneer over it. So there was a piece of plywood between each canopy beam and each rectangular section was trimmed with a small molding. I suspect the labor in cutting each of these panels and installing the trim was more than the labor to refinish. Anyway, we have removed the plywood which had largely delaminated and we stripped off the 110 year old varnish. Any questionable wood has been replaced. We made a new molding cutter to recreate the bead detail on the wooden strips used in the canopy and made a couple of hundred feet to replace damaged or soft pieces. The underside has been sanded, restained and varnished. The top side has had slots cut to recess new wiring, and has been resurfaced and sanded. This took a year. We have yet to put the Dacron covering on the top and reinstall all the vents, mast steps, and electrical boxes. The engine room had a raised enclosure extending about two feet above the deck, measuring about 16 feet long and 7 feet wide. The sides are still original and are made of riveted steel with rounded corners, a nice piece of work. Originally it did not have a top, the boiler and steam engine being exposed. McKee had installed a top using mahogany flooring so people could sit on it. At first glance it looked nice and I thought: great, I can reuse it just as it is. But as I got into it, the first thing I found were numerous chips where the edges of the hatches had been abused and wood splintered out, and many dents on the top surface where something had been dropped on it. So I was faced with filling the imperfections with some kind of filler, trying to sand them out, or cutting in plugs and patches. While I was thinking about this I noticed large, egg-shaped swirls, some quite deep, cut into the top surface. Looking closer, it appeared that someone had used a belt sander and had let it tip slightly in one direction, and then the other direction, as the sander was moved across the surface, each tilt cutting a swirl. Not to be deterred yet, I decided to take all the planking off and run it through a planer to clean it up. However, when I started to dismantle the hatches and top, I found that the mahogany strips had been toe-nailed with steel nails that left little black rust dots where ever a nail was placed. At that point I decided to simply replace the entire top. One of the unexpected things that come up in any restoration. Then I discovered that the engine box wasn't square. It was an inch longer on one side, and about 3/4 inch wider on one end. Also there was a crown on the front and back to match the deck, but the middle was flat, apparently the carpenters who put the top on during the McKee restoration didn't take the time to cut the same crown into all the cross beams. So I worked through it and made a new steel framework for the top that was bent to match the existing crown before I put the new planking down. These slightly curved steel beams were made by Kerry Berry, production manager at Marie Kropp's company, Waukegan Steel. I added four portholes in the sides for light and air so we can construct a state room with bunks where the old steam boiler and coal storage had been located. There went six months of work on one of the few things I thought I could clean up and reuse.
|